Add a super fund
Gimbla Payroll includes a pre-loaded selection of commonly used regulated super funds. If an employee nominates a fund that is not currently listed, you can manually add it from the Super Funds screen.
This guide covers how to add both regulated super funds and self-managed super funds (SMSFs), including the bank details and Electronic Service Address (ESA) required for SMSF compliance.
When adding a regulated super fund, the critical fields are the ABN and the Unique Superannuation Identifier (USI). You can verify these details via the official Super Fund Lookup registry or from the fund's website.
For example, you can find reference ABN and USI details directly on the Australian Retirement Trust website.
🧭 Navigation To
🏷️ How to add a regulated super fund
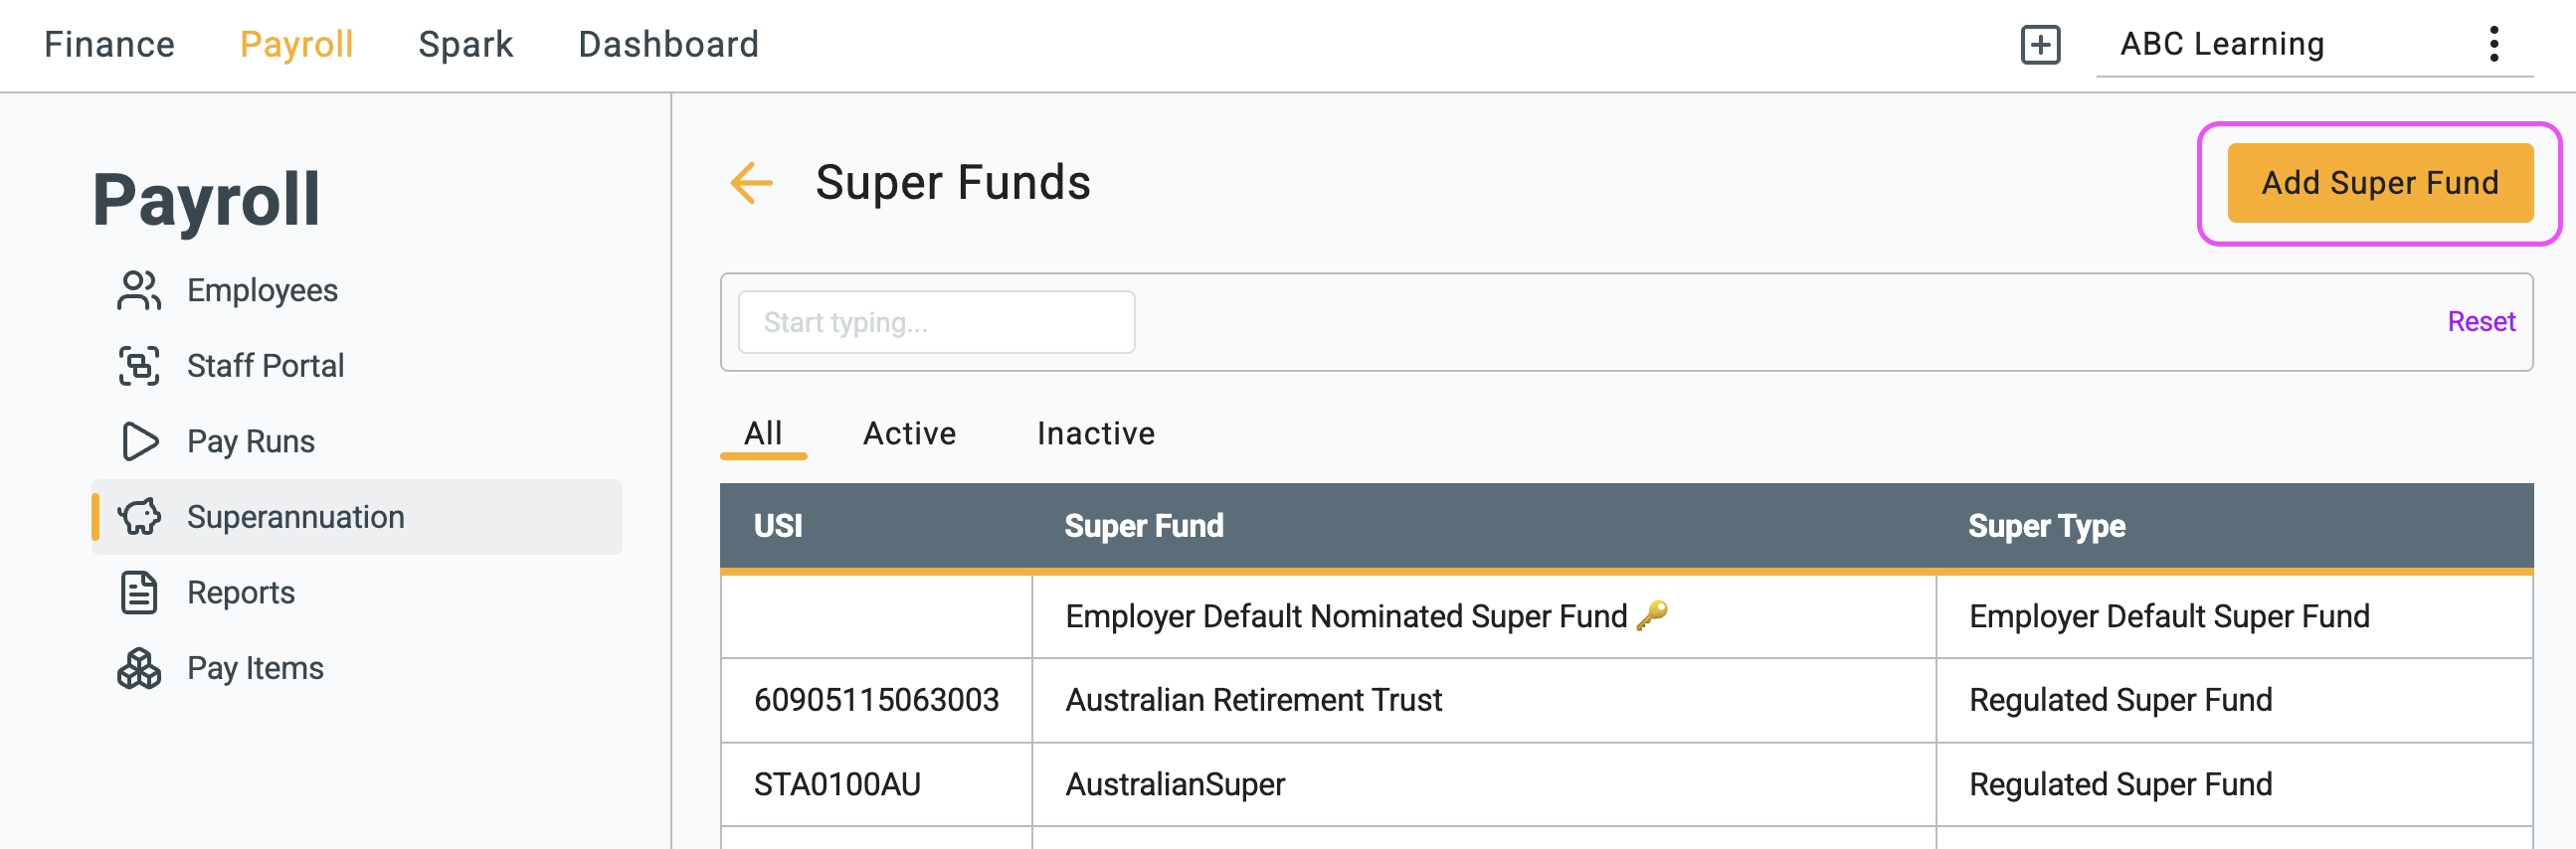
1 Click the Add Super Fund
button on the Super Funds list
screen.
2 Select Regulated Super Fund under Super Type, then enter the fund's name, ABN, and USI. Make sure these details match the information on Super Fund Lookup. If you have an employer identifier assigned by the fund, enter it in the Employer Number field.
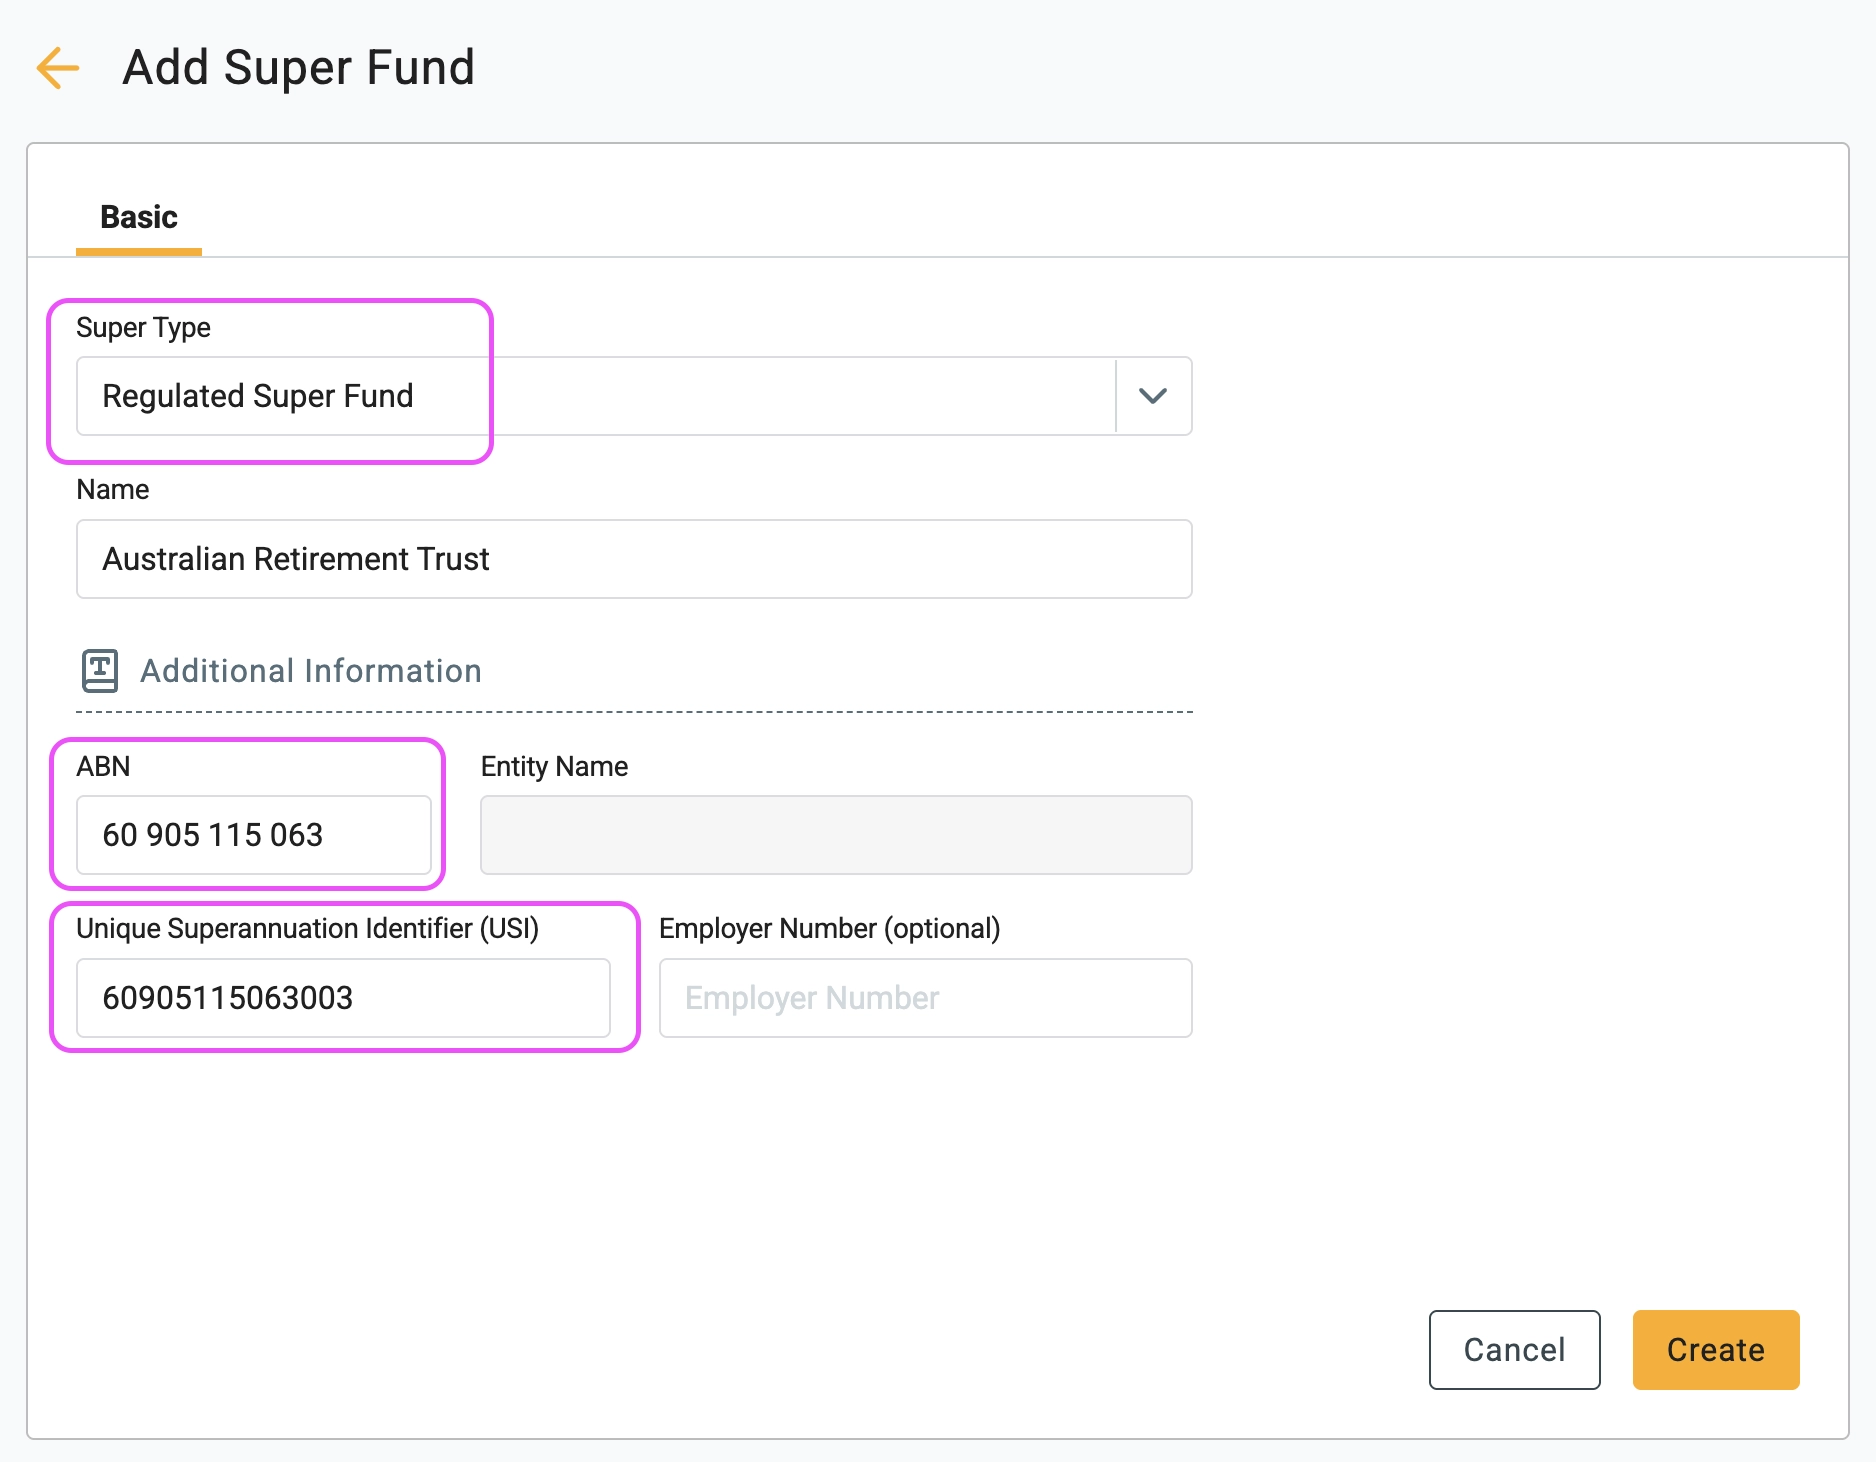 3 Verify the entered information, then click
 Create.
🏷️ How to add a self-managed super fund (SMSF)
1 Select Self Managed Super Fund under Super Type, then enter the SMSF name, ABN, and its Electronic Service Address (ESA).
2 Complete the bank account section by entering the BSB, account number, and account name provided by the SMSF trustees.

3 Carefully review the bank and registration details, then click
Create
.
🏁 Next steps
Once saved, the newly created fund will appear in your Super Funds list. You can now select this fund when configuring an employee's superannuation details or while compiling superannuation payment files.